
TL;DR

Get tech for your team delivered free — and shop member deals
- Fast, free delivery on millions of items
- Access to Prime Big Deal Days deals on October 6–7
- Prime Video, Amazon Music and more included
A kayak roof rack combines vehicle-compatible crossbars or another approved base with kayak supports and tie-downs. Choose a carrier by checking your vehicle and kayak fit, the lowest applicable load limit across the whole system, and how you will lift and secure the boat; then follow the maker’s travel and inspection instructions.
A kayak can look light on the driveway and feel like a sail once it is strapped above your head. The right kayak roof rack makes the trip easier, but only when the carrier, crossbars, vehicle, and boat all work together.
This guide explains the main carrier styles, how to check fit and capacity, and what to look for when replacing a rack whose listing may have changed or disappeared. You’ll also get a practical checklist for loading and driving, so your next launch starts with a secure boat instead of a roadside strap check.
Check the vehicle roof, crossbars, kayak dimensions, and carrier fit guide before buying a replacement.
Count the kayak, carrier, and other roof cargo against the lowest applicable on-road limit in the full system.
Choose J-cradles, saddles, stackers, pads, or load assist based on hull shape, roof space, and loading effort.
Use carrier straps as directed, add bow and stern tie-downs when recommended, and recheck for movement during travel.
Treat a missing or changed product listing as a reason to verify current specifications, not as proof of discontinuation.
What a kayak roof rack includes—and what it doesn’t
A kayak roof rack is a system for carrying a kayak on a vehicle roof, usually combining a vehicle-compatible base rack or crossbars with kayak supports and straps. The carrier that cradles the boat may be only one part of that system, so check what your vehicle already has before shopping.
For example, a crossover with factory rails may still need crossbars before J-cradles can attach. A sedan with a bare roof may need a vehicle-specific base rack, while some temporary pad systems are designed for roofs without permanent crossbars. Read both the vehicle and carrier fit guidance; a broad “fits most” claim cannot tell you whether your exact roof and crossbar shape work.
Think of the setup as a chain: vehicle roof, base rack, crossbars, carrier, straps, kayak. Each link has to fit and carry its share. The kayak roof rack may be the visible piece, but the whole system determines whether the boat sits securely.
Pick the carrier style that suits your kayak and roof
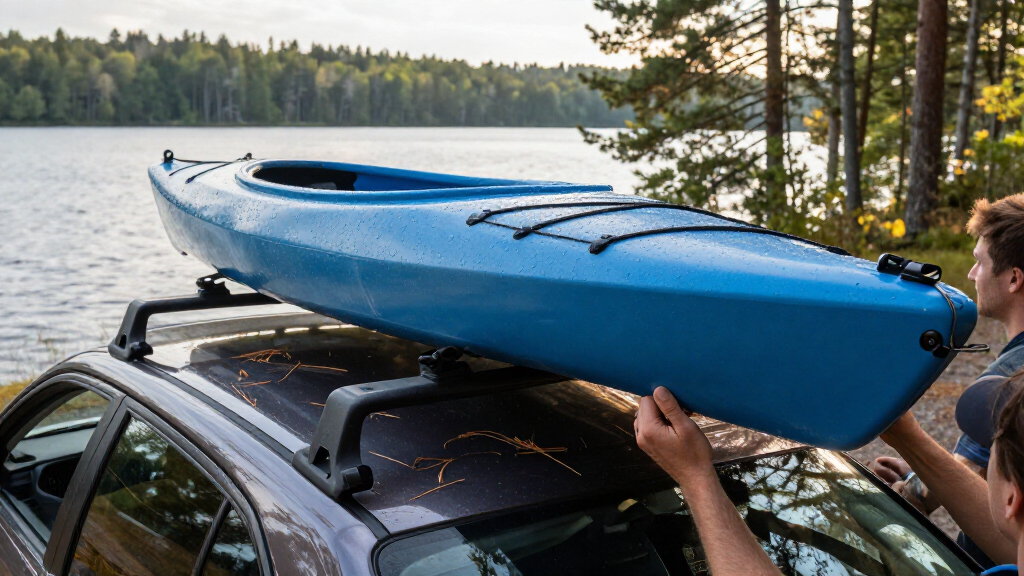
J-cradles carry a kayak on its side and use less roof width, while saddles support the hull across the crossbars. Stackers can make room for several boats, and foam pads offer a simpler temporary setup; rollers or load-assist carriers can make lifting easier. The right style depends on your boat’s shape, available roof space, and how you plan to load it.
| Carrier style | What it does | When it may suit you | What to check |
|---|---|---|---|
| J-cradles | Hold the kayak on its side | You want to preserve roof width or may carry another boat | Cradle fit, kayak width, crossbar spacing, and loading height |
| Saddles or cradles | Support the hull across the bars | Your kayak benefits from broader hull support | Contact points and compatibility with the hull shape |
| Stackers | Carry kayaks on their sides, often in a row | You need to transport more than one boat | Total system capacity, roof width, and individual tie-downs |
| Foam blocks or pads | Provide a simpler support surface | You want a temporary option designed for your vehicle | Roof compatibility and the maker’s attachment instructions |
| Rollers or load assist | Help slide or raise the kayak | You load alone or have a tall vehicle | Fit, operation, and any added system weight |
Picture loading a wide fishing kayak beside a narrow touring boat: a J-cradle may leave more roof width free, but a saddle may provide a broader rest for a hull that does not sit comfortably on its side. Neither style wins for every boat. Test the fit on paper using the kayak’s dimensions and the carrier maker’s current guide before you buy.
Check fit before you order a replacement
A replacement kayak roof rack fits only when the vehicle roof, base rack or crossbars, carrier, and kayak dimensions match the maker’s guidance. Check your vehicle’s year, make, model, and roof type, then compare the bar shape and dimensions with the carrier’s mounting hardware requirements. This matters because a carrier can clamp securely to a bar yet still be poorly positioned for the kayak, or appear compatible while its mounting hardware cannot grip the bar correctly. Fit is a chain of interfaces, so one mismatch can make the rest of the setup unreliable.
- Identify your roof setup. Note whether you have raised rails, flush rails, fixed points, factory crossbars, or a bare roof. If your SUV has rails but no bars, confirm whether the carrier requires separate crossbars. Rails and crossbars serve different purposes: the rails provide attachment points, while the bars span the roof and give the carrier a mounting surface.
- Measure your kayak. Record its length, width, and weight from the boat’s documentation or maker’s specifications. A kayak that is too wide or heavy for the cradles can be a poor match even when the hardware fits the bars. Width affects whether the boat settles into the support, while weight affects both the carrier’s rating and the effort needed to load it.
- Check crossbar details. Look up bar width, profile, spacing, and any limits on clamp or bolt mounting. “Universal” hardware still has physical limits. Bar spacing also affects where the supports can sit; bars placed too close together or too far apart may leave the kayak unsupported at the intended points.
- Confirm system capacity. Compare the vehicle roof limit, base rack and crossbar limits, and carrier limit. Include the kayak and all other roof cargo. The smallest rating controls because the weakest component cannot safely inherit capacity from stronger parts.
- Review current fit instructions. Use the current vehicle and carrier maker guidance, since model-year changes and product revisions can affect compatibility. A familiar product name does not guarantee identical hardware or approved fit across revisions.
For instance, a compact SUV owner replacing a discontinued-looking J-bar set should not assume the new set uses the same mounting bolts or suits the same kayak width. A quick measurement and a fit-guide check can prevent a return trip and a wobbly first installation. It also reveals early if a different carrier style or a new base rack is part of the real replacement cost.
Use the lowest load limit across the whole setup
Your safe on-road roof load follows the lowest applicable limit among the vehicle, base rack, crossbars, and carrier. Count the kayak, carrier hardware, and any other roof cargo together; a larger number printed on one component does not raise a lower limit elsewhere. This is a system limit: exceeding any single component’s rating can strain its attachment points even when the roof itself is rated for more.
Suppose your vehicle allows 165 pounds on the roof, your crossbars allow 120, and the kayak carrier allows 75. The 75-pound carrier limit governs that setup, and the total carried load still includes the carrier itself as directed by its maker. If you plan to add a second kayak or a cargo box, recalculate the combined load rather than treating each item as if it gets the full roof allowance. The practical consequence is that a carrier with a high published capacity may add little usable capacity if your vehicle or bars have a lower rating.
Use the lowest on-road rating in the system. A stationary or “static” roof rating describes a different condition and is not a substitute for the vehicle and rack makers’ driving limits. Driving adds wind and motion forces that a parked roof does not experience in the same way.
Specifications can be incomplete or unclear, especially on marketplace listings. If a carrier page gives a maximum load but does not explain what it includes, look for the manufacturer’s instructions or contact the maker before using that figure to plan your load. Until the rating’s meaning is clear, you cannot reliably tell how much capacity remains for the kayak.
Compare replacement racks by the details that matter
Compare replacement kayak roof racks by their stated material, included hardware, capacity information, and mounting fit. In the supplied product specifications, the original-style rack is listed as alloy steel with an anti-rust coating, two racks, four ropes, and a 75-pound maximum load; alternatives differ in what they include and what capacity they publish.
| Listed option | Material in supplied specs | Included items in supplied specs | Published load figure in supplied specs |
|---|---|---|---|
| Kayak Roof Rack | Alloy steel with anti-rust coating | 2 racks and 4 ropes | 75 pounds |
| FORWODE Premium Kayak Roof Rack | Carbon steel | Ratchet belts, S-hook pulleys, anchor belts | 160 pounds |
| Kayak Roof Rack 2 Pairs Heavy Duty | Steel with rust-resistant coating | 4 racks, 4 heavy-duty tie-down straps, universal mounting hardware | Not specified in supplied specs |
| Taelakeni 2 Pairs Kayak Carrier Racks | High-quality steel | Not specified in supplied specs | 150 pounds |
| PIRIPARA Kayak Roof Rack – Set | Alloy steel | 4 racks, 4 tie-down straps, mounting hardware | Not specified in supplied specs |
The table helps narrow a search, but it does not confirm current fit or the meaning of a listed load rating. For example, if you need a full set of four supports and included tie-downs, the two listings that specify those parts may be easier to compare. Still, check current instructions and calculate the whole system’s limit before treating any number as your safe driving capacity. Included hardware affects convenience, but the mounting style and fit determine whether it can be installed correctly on your bars.
If the exact product page no longer appears, treat that as a cue to compare specifications rather than proof that the product has been discontinued. Marketplace listings change, and sellers may update titles or bundles. Match the details you need—especially crossbar compatibility, number of cradles, straps, and published capacity—against current manufacturer information. A listing with more accessories is not automatically the better replacement if its bars do not fit or its rating is unclear.
Secure the kayak with a repeatable loading routine
Secure a kayak by positioning it on supports designed for its hull, tightening the carrier straps as instructed, and adding bow and stern lines when the carrier or vehicle maker recommends them. After loading, check that neither the boat nor rack shifts, and recheck the setup during the trip. A repeatable routine makes it easier to notice a changed strap path or loose fitting before wind and road movement test the load.
- Set the supports and kayak position. Confirm the carriers are mounted and spaced as directed. Center the kayak so it rests on the intended contact points rather than rocking on an edge. Broad, even support reduces pressure on any one part of the hull.
- Fasten the carrier straps. Route each strap through the designated points and tighten it until the kayak stays put. Avoid crushing the hull; thin or plastic hulls can deform under excessive pressure. The aim is restraint, not compression: more force can damage the boat without improving a poor fit.
- Add bow and stern tie-downs when specified. Attach them only to suitable vehicle points, not decorative trim or parts that can pull free. Keep the lines snug without using them to bend the boat downward. These lines can help control fore-and-aft movement, while the carrier straps hold the kayak against its supports.
- Check for movement. Gently push the kayak at the bow and stern. If the boat slides or the rack shifts, stop and correct the mounting or strap path before driving. Movement can indicate that the supports are misplaced or the straps are not restraining the kayak in the intended direction.
- Tidy loose strap ends. Secure tails so they cannot flap against the roof or windshield, then follow any speed and inspection instructions from the vehicle and carrier makers. Loose ends can distract you and may obscure whether a strap has loosened.
Imagine stopping in a quiet parking lot before a two-hour drive to the lake. A firm hand check at each end, a look at the tie-down points, and a tug on each loose strap tail take little time; that pause is easier than discovering a rattling strap at highway speed. Repeating the same checks after the first stretch also helps catch settling straps before the rest of the drive.
Make loading manageable for your height and strength
A rack that fits your kayak can still be awkward if the vehicle is tall or the boat is heavy. Loading effort depends on the vehicle’s roof height, your reach, the kayak’s weight, and whether you have help; rollers and load-assist carriers can reduce the lift or let you slide the boat into place. This is more than a comfort issue: if you cannot control the kayak throughout the lift, you may bump the vehicle, strain yourself, or fail to position the boat accurately.
Consider a solo paddler with a high-roof SUV and a long touring kayak. J-cradles may suit the narrow roof footprint, but the paddler might need a step stool, a safer loading position, or a roller system to avoid reaching overhead with a twisting back. A shorter driver loading a light kayak onto a wagon may find simple saddles easier and quicker. The tradeoff is that load-assist equipment can add cost, weight, and setup steps, while a simpler carrier asks more of the person lifting.
Before choosing, check how the kayak must move during loading: lifted straight up, rolled from the rear, or slid onto supports. Make sure the carrier’s load-assist mechanism is compatible with your bars and vehicle, and account for its weight in the system load. A few minutes rehearsing the movement on the driveway can reveal whether the setup feels controlled or precarious. That practical trial can matter more than a feature list, because it tests the exact reach and lifting path you will repeat at the launch.
Drive with the extra height and wind in mind
A kayak adds height and wind resistance, so plan for low-clearance structures, changing road conditions, and the vehicle and carrier makers’ travel instructions. Follow any stated speed limit, keep strap ends secure, and stop to inspect the load at the intervals recommended by the makers. The added height can turn a familiar route into a clearance problem, while wind can increase movement and noise, so the loaded vehicle needs a little more attention than usual.
A kayak can be easy to forget after you leave the driveway. A parking garage entrance, a low branch, or a gust across an exposed bridge can turn a familiar trip into a problem. Before setting off, know the total vehicle height with the boat loaded and route around places where clearance is tight. Wind exposure also varies with the kayak’s shape and position, so a setup that feels calm on a sheltered street may behave differently on an open road.
- Check the height: add the vehicle’s height, rack, and kayak, then keep that figure in mind around garages and covered lanes.
- Follow speed guidance: use the speed limits and travel directions in the vehicle and carrier manuals.
- Recheck on the road: inspect the straps and tie-downs during the trip, particularly after the first stretch of driving.
- Think about security: straps may hold a kayak for travel without preventing theft. For an unattended stop, a lockable carrier can add security, but avoid leaving gear exposed in a risky location.
On a windy afternoon, a loose strap tail can tap and whip against the roof like a small flag. Tie it down before driving, and if the kayak or carrier begins to move, pull over somewhere safe and inspect the entire system. A small noise may be the first sign that a strap has loosened or a fitting has shifted.
Avoid the fit and strap mistakes that damage boats
Most preventable transport trouble starts with a poor fit, too much strap tension, or a missed check. Use supports shaped for the kayak, follow the boat’s transport guidance, and avoid leaving the hull under pressure in the wrong places for long periods. These issues compound: an uneven support concentrates pressure, and tightening harder to stop movement can make hull damage more likely.
A narrow support point can press into a hull, while an overtightened strap can flatten or distort some boats. A kayak that looks secure on a short driveway test may still shift if it rests unevenly or the straps cross incorrectly. Place the boat on the intended supports and tighten enough to prevent movement without forcing the hull down. If the kayak keeps moving despite firm, correctly routed straps, that is a fit problem to solve rather than a reason to pull harder.
- Don’t assume every bar fits: mounting hardware may have limits for bar width, shape, or spacing.
- Don’t treat a missing capacity as permission: if the listing does not specify a load rating, find the manufacturer’s guidance before travel.
- Don’t rely on straps alone for theft protection: transport restraint and security are different jobs.
- Don’t leave a loaded kayak unattended for long periods without considering conditions: weather, location, and hull support all matter.
For example, a wide recreational kayak may rest securely in a saddle but wobble in a narrow cradle intended for a different hull profile. If the fit looks pinched, unstable, or uneven in the driveway, adjust the support or choose a carrier better suited to the boat before the trip. Fixing the contact points protects the hull and gives the straps a stable shape to hold.
Use these key facts to make your final choice
The key facts and final choice come down to four checks: vehicle fit, kayak fit, whole-system capacity, and loading effort. When those four align, you can compare included straps and hardware with confidence rather than choosing by a product title alone. Each check answers a different question: can it attach, can it support this hull, can the entire system carry the load, and can you use it consistently?
Say you own a compact crossover, one 45-pound kayak, and crossbars already installed. A two-cradle J-style set may save roof width, but you still need to verify that its clamps match your bars, that the kayak sits securely in the cradles, and that the carrier’s stated limit accounts for the complete arrangement. If the boat is difficult to lift, a load-assist feature may matter more than an extra strap in the box. That choice trades a simpler, cheaper setup for easier handling; the right balance depends on how often and how safely you expect to load alone.
- Start with the vehicle: confirm the roof type and whether you need a specific base rack or crossbars.
- Match the boat: check width, weight, hull shape, and the carrier’s recommended support positions.
- Compare complete-system limits: use the lowest applicable on-road rating and count the carrier and other cargo.
- Choose for real loading conditions: consider roof height, solo loading, and how far you carry the kayak from storage to the car.
- Read the current instructions: listings and product bundles can change, so verify the maker’s latest fit and tie-down guidance.
A little measuring now can save you from balancing a boat above a car while discovering the bolts do not fit. The right replacement is the one that works with your actual vehicle and kayak, then lets you repeat the same secure routine every trip. If one of the four checks fails, resolve that mismatch before comparing smaller conveniences such as extra straps or finish.
Frequently Asked Questions
Do I need crossbars before installing a kayak roof rack?
Often, yes: many kayak carriers attach to crossbars, and some vehicles need a separate base rack before you can add them. Some temporary pad systems are designed for roofs without a full rack, but you still need to confirm roof compatibility and follow the maker’s instructions.
Are J-cradles or saddles better for a kayak?
It depends on the kayak’s hull, the roof space, and your loading preference. J-cradles hold the kayak on its side and use less roof width, while saddles support the hull across the bars; check which style holds your particular boat securely.
Can I carry two kayaks on one roof rack?
Sometimes, if the roof width, carrier arrangement, crossbar spacing, and combined load limit allow it. Make sure each kayak has its own secure support and straps, and that the boats do not interfere with each other.
Do I need bow and stern tie-downs?
Follow the carrier and vehicle makers’ instructions; they commonly recommend bow and stern lines as added restraint. Attach them to suitable points on the vehicle, and keep them snug without bending or deforming the kayak.
Can one person load a kayak onto a roof rack?
That depends on the boat’s weight, roof height, your reach, and how comfortably you can lift and control it. Rollers or load-assist carriers can make solo loading easier, especially on taller vehicles.
Conclusion
Choose a kayak roof rack by matching the vehicle, crossbars, and kayak first, then use the lowest applicable system limit and the maker’s tie-down instructions. A secure boat should sit quietly above you, with every strap tucked in and every clearance accounted for.
Evergreen bestsellers Picks
bestsellers
As an affiliate, we earn on qualifying purchases.